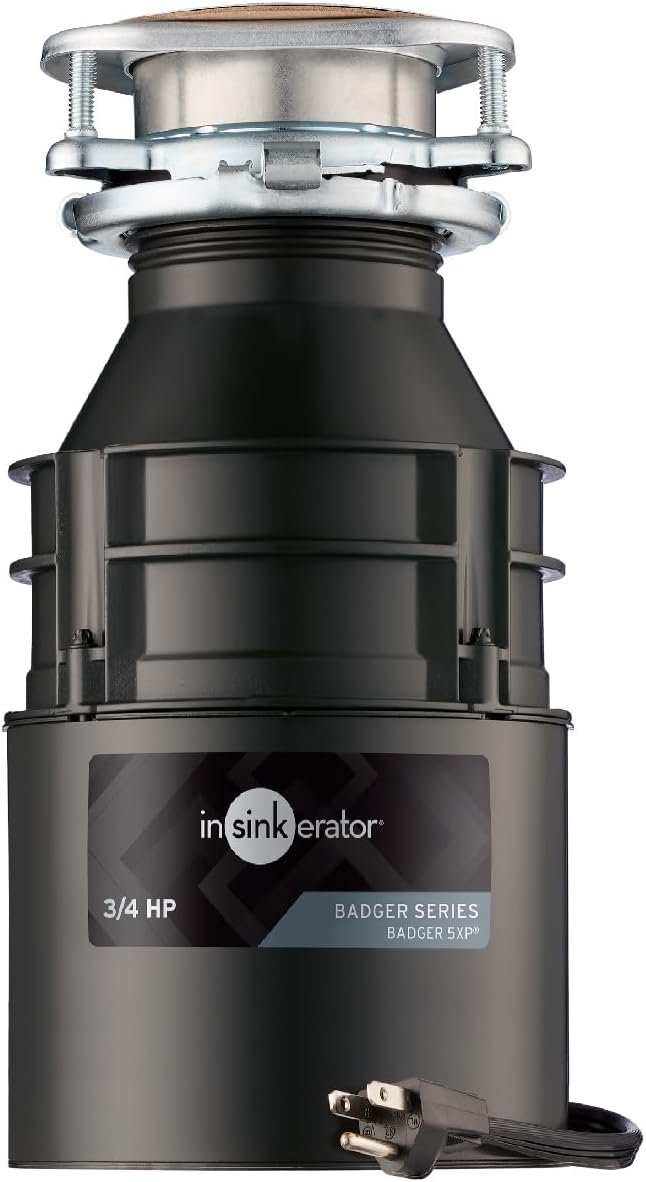

How to Use a Batch Feed Garbage Disposal Properly
To use a batch feed garbage disposal, first load food waste into the chamber, then place the stopper in the drain and turn the cold water on before twisting the stopper to activate the unit. You must use the stopper to start and stop the grinding process, unlike continuous feed models which run on a wall switch. This is the key difference that makes batch feed garbage disposal operation simple, safer, and splash-free.
You may be wondering if this type of disposal is right for your kitchen. We found that many homeowners prefer batch feed models because they are significantly safer for households with kids, since there’s no exposed switch to accidentally flip. We’ll cover the correct loading order, what foods to avoid, and how to properly clean the unit so it lasts for years.
- First, remove any silverware or large objects from the sink basin before you start.
- Load the food waste into the chamber first, then run the water and activate the unit.
- Always use cold water — it keeps food fats solid so they get ground and flushed away properly.
- Run the disposal for about 30 seconds after the grinding noise stops to ensure everything is fully processed.
- Never put fibrous foods (like celery) or starchy items (like potato peels) in a batch feed unit, as they cause clogs and dull the blades quickly.
Below, we break down the step-by-step process so you can master your batch feed garbage disposal without any guesswork. Let’s walk through exactly how to load, grind, and maintain it like a pro.
Mastering Your Batch Feed Garbage Disposal Routine
We found that the biggest mistake people make is treating a batch feed unit like a continuous feed one. You cannot just flip a switch and walk away. The stopper is your control panel. Once you get that muscle memory down, you will wonder why every disposal isn’t built this way.
Think of it like a blender. You add your ingredients, lock the lid, and then blend. The process is deliberate, contained, and safe for everyone in the house. Let’s break down the exact sequence you need to follow every single time.
The Correct Loading Order for Your Disposal
Order matters more than you might think. If you dump water in before the food, you are just splashing around. If you run the unit empty, you are wasting water and wearing down the grind ring for no reason.
Here is the simple sequence we recommend. Get this down, and you will avoid 90% of common jams and clogs.
Step 1: Clear the Sink of Foreign Objects
Check the basin for forks, spoons, bottle caps, or stray chopsticks. We found that a dropped spoon is the number one reason batch feed stoppers get stuck. They wedge between the stopper and the grind chamber, preventing the unit from locking into place. Take two seconds to scan the sink before you start loading.
Step 2: Load the Food Waste Dry
Scrape your plates directly into the chamber. Do not turn the water on yet. You want the food sitting at the bottom, ready to go. There is no need to shove it down with your hands. Just let gravity do the work.
If you have a large amount of waste, split it into two batches. Overloading the chamber makes the motor work harder and leaves unground chunks stuck under the rotating plate.
Step 3: Turn on the Cold Water
Now, turn the faucet on. We recommend a strong, steady stream of cold water only. Hot water melts fats and grease, which then solidify further down the drain and cause blockages. Cold water keeps those fats solid so the disposal can chop them up and flush them away effectively.
Step 4: Place the Stopper and Twist to Start
Insert the stopper into the drain opening. Line up the tabs and press down. Now, twist it clockwise until you feel it catch and the motor kicks on. The unit will only run while the stopper is engaged. This is your safety mechanism. Nothing starts unless that cap is locked.
Step 5: Let It Grind and Rinse
Let the disposal run for a few seconds after you stop hearing the grinding noise. This ensures all the particles are small enough to pass through the pipes. Keep the water running for another 10 seconds after you twist the stopper back to the “off” position to clear the drain line completely.
Foods That Wreck Your Batch Feed Blades
Even though these units are powerful, they are not magical. We found that understanding what not to put down the drain is just as important as knowing the start sequence. Certain foods will dull the grinders, create stubborn clogs, or turn into a paste that blocks the pipes completely.
The main rule is this: if it is stringy, hard, or it expands with water, keep it out of the sink.
Your “Do Not Grind” List
- Fibrous vegetables like celery, corn husks, and artichoke leaves. They wrap around the grind mechanism and cause the motor to stall.
- Starchy foods like potato peels and pasta. They turn into a sticky paste that clings to the blades and pipes.
- Grease and cooking oil. These solidify in the drain and create a sticky trap for other debris.
- Large bones or fruit pits. They are too hard for the unit to break down efficiently and can blunt the grind ring.
- Coffee grounds. They pack down tightly in the pipes and eventually cause a blockage that requires professional cleaning.
Many experts recommend composting these items instead. Your disposal is for small scraps, not the entire plate leftovers.
Cleaning and Freshening Your Batch Feed Unit
Bad odors happen. Food particles get lodged in the seals and under the stopper. We found that a quick weekly clean prevents the “sour sink” smell that tends to linger in kitchens with disposals.
The good news? You do not need harsh chemicals. In fact, we advise against them. They can corrode the rubber gaskets and the metal components over time.
The Natural Cleaning Method That Works
We found that the easiest way to clean is to use the things you already have in your pantry. This process takes less than two minutes and leaves the entire unit smelling like a fresh citrus grove.
Ice Cubes and Salt
Drop a handful of ice cubes into the dry chamber. Add a couple of tablespoons of coarse salt. Twist the stopper to start the unit and run it for about 30 seconds. The ice sharpens the blades, and the salt scrubs away the grime from the interior walls.
Citrus Peels for Freshness
Toss in a few lemon or orange peels along with the cold water. Run the unit for 15 seconds. The natural citrus oils cut through the grease and leave a bright, clean scent. We recommend skipping commercial “freshener” pods, as they often leave a sticky residue that attracts more grime.
A Quick Table for Cleaning Schedule
| Task | Frequency | Method |
|---|---|---|
| Ice and Salt Scrub | Weekly | Run with cold water for 30 seconds |
| Citrus Peel Rinse | Every other week | Grind peels to freshen rubber gaskets |
| Deep Drain Flush | Monthly | Fill sink with water, remove stopper, let drain rapidly |
Fixing Common Batch Feed Jams and Stopper Problems
Sometimes, things go wrong. The unit hums but does not spin. The stopper refuses to turn. We get it—it feels stressful when your sink is full of water and nothing is draining.
Before you panic and call a plumber, there are a few simple fixes you can try safely at home.
When the Motor Hums but Won’t Spin
This usually means the grinding plate is stuck. We found that most units have a hexagon-shaped hole on the bottom of the motor housing. You can insert a standard Allen wrench and manually rotate the blades back and forth to dislodge whatever is jammed underneath.
When the Stopper Won’t Lock In
Check the rubber gasket on the stopper itself. Food debris often gets wedged in the grooves, preventing a tight seal. Wipe it clean, check for damage, and try again.
Always switch off the circuit breaker before you stick anything up into the disposal. Even though it is a batch feed model, it is better to be safe than sorry.
A Handy Checklist for Every Use
To wrap this up, here is a quick checklist you can pin to your fridge or keep in your head. We found that following these six steps keeps your disposal running smooth and your drains clear.
- Scan the sink for loose silverware or metal objects.
- Load food scraps into the empty chamber first.
- Turn on cold water with a strong flow.
- Insert and twist the stopper to start grinding.
- Wait for silence, then let it run for 5 more seconds.
- Turn off the stopper and let the water flush for 10 seconds.
That is the entire process. It is simple, it is safe, and it will keep your kitchen smelling fresh. Once you practice the sequence a few times, it becomes second nature.
Conclusion
Mastering your batch feed garbage disposal comes down to one simple habit: always use the stopper to control the grind. You load food first, run cold water, twist the cap, and let it work. That is the entire secret.
Skip the fibrous veggies, grease, and coffee grounds. Clean it weekly with ice and salt. When something jams, grab an Allen wrench and check the bottom of the unit. These small steps keep your drains clear and your disposal running for years.
Your next step is simple. Practice the checklist we gave you tonight. Run one small batch from start to finish. In less than five minutes, you will have the routine down cold. Your sink will thank you.
Frequently Asked Questions
Can you put dish soap in a batch feed garbage disposal?
You can, but we do not recommend it. Dish soap creates heavy foam that can bubble up out of the drain and make a mess. Use the ice and salt method instead. It cleans the grinding chamber without the suds.
How long should a batch feed garbage disposal last?
Most quality batch feed units last between 10 and 15 years with proper care. The key is avoiding hard items like bones and keeping the grind ring clear of grease buildup. Regular weekly cleaning extends the life noticeably.
Why does my batch feed disposal turn on but the stopper pops back up?
This usually means the locking tabs are not aligning properly. Check for food debris wedged in the grooves of the stopper or the drain ring. Clean both surfaces, then press down firmly and twist until you feel a solid click.
Is it safe to put eggshells in a batch feed garbage disposal?
Yes, eggshells are actually fine in small amounts. The membrane inside the shell helps scrub the grind ring. Just do not dump a dozen at once. A few shells per batch are totally safe and help clean the unit.
Do you need a plumber to install a batch feed disposal?
Not always. If you are replacing an existing unit with the same wiring setup, you can do it yourself in about an hour. The process involves basic plumbing and a simple electrical connection. If you are unsure about the wiring, hire a licensed electrician.